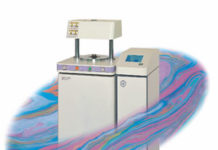
OSP Overview
The VersaSCAN OSP integrates the Base with a high-accuracy, high-speed laser displacement sensor. The OSP technique uses diffuse reflection mechanism to measure topography of a sample. OSP can be used to measure topography, as a very sensitive leveling mechanism, or charting topography to be implemented with other scanning probe techniques for constant-distance mode operation.
OSP Specifications
| Measurement Range | ±10mm |
| Laser | Class 2, 650nm, 0.95mW |
| Repeatability | 0.025 microns |
| Spot Size | 50 microns at reference distance of 50mm |
| Correct Postitioning | Red light/green light |
OSP Experiments
|
Line Scan |
OSP Line Scan moves the laser head in a single direction and graphs the sensor measurement versus position. This intensity can be calibrated to be reported as topography. Either diffuse-scattered light or specural-reflected light can be measured. |
|
|
|
|
Area Scan |
OSP Area Scan performs several x-line scan experiments at incremented Y-position. This creates an area map. This topographic data can then be used as a background to run different techniques in constant-distance mode (SVP, SECM, SDS; SKP is easier to use CHM or CTM methods). |


Comments are closed.